How to Survive the Worm in DONT SWIM
The final fail condition — escape routes, vision, and teamwork after every level is cleared.
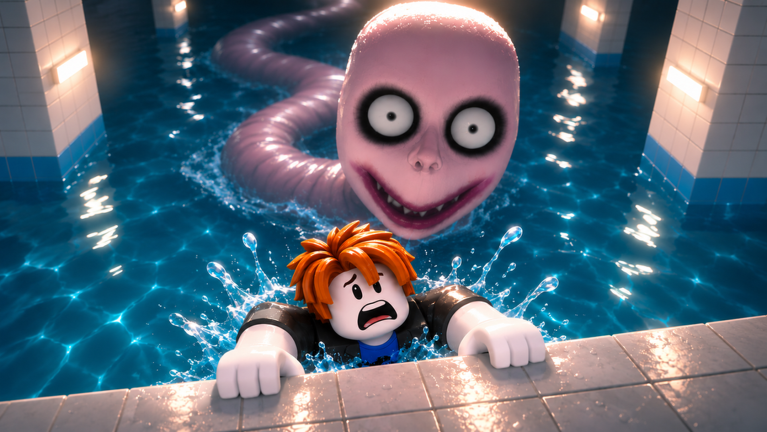
The Worm is the real final boss
In DONT SWIM, clearing every Poolrooms stage is only the setup. Once the last level falls, the Worm enters and the objective flips from precision jumping to pure survival. Getting grabbed ends the run the same way swimming does. If you came from the Level Walkthrough, stay focused — celebration deaths are common.
This guide covers spawn timing, movement priorities, camera habits, and 20-player coordination. Pair it with Controls if your feet still betray you near leftover water.
When the Worm appears
Community guides and the official description agree on the sequence:
- You clear levels in order without swimming.
- After all levels are done, the Worm encounter begins.
- Your only job becomes: do not get caught.
There is no mid-game Worm ambush during normal stage progress. That means early-run paranoia should target water, not the monster. Save monster focus for the finale.
Win condition vs fail condition
| Outcome | Cause |
|---|---|
| Fail | Worm catches you |
| Fail | You enter swim state while fleeing |
| Success | You escape / survive the chase sequence |
Exact escape geometry can shift with patches — check Updates after big content drops — but the priorities below stay stable.
Opening seconds: do not freeze
The first five seconds decide most wipes:
- Stop looting coins the frame the Worm cue hits.
- Turn camera until you locate the Worm body or head silhouette.
- Break line-of-approach — lateral movement beats straight retreat into a wall.
- Pre-mark two exits: primary and backup.
- If you are in a crowd, spread; clumping creates free multi-catches.
Reading Worm movement
Public clears describe a large worm-like monster with an oversized head silhouette — easy to spot once you know to look for mass, not footsteps. Practical reads:
- Commit direction early. The Worm telegraphs broad turns more than tiny feints.
- Do not mirror into water. A “perfect” kiting line that clips a pool still fails you on swim rules.
- Use verticality when available. High tiles buy decision time; sinking or low pads spend it.
- Break vision with structures without trapping yourself in dead ends.
If you lose sight, assume it is closer than it feels and keep moving toward open routes.
Solo survival plan
- Clear the final stage with at least one mental escape path already chosen.
- On Worm spawn, sprint that path while hugging dry centres.
- Take wide arcs rather than 180° panic turns that fling you off edges.
- If the Worm cuts you off, spend the backup route immediately — hesitation is a grab.
- Reset camera only on stable floors, never mid-jump.
Solo runs are quieter but less forgiving; nobody will body-block or call directions for you. Warm up with Getting Started habits so you are not inventing movement tech mid-chase.
Group survival plan (up to 20 players)
Crowded finales are chaos engines. Set norms before the last stage:
- One caller announces Worm side (“left tunnel”, “high pad”).
- No shoving on choke tiles.
- Split into two pods so one grab does not delete the whole lobby visually.
- Do not bait friends into water for content — that is still a fail for them and usually for you when you follow.
More lobby etiquette lives on the Players hub.
Water still kills during the chase
Players tunnel-vision the monster and forget the original rule. The Worm can herd you toward pools on purpose. If your kite path requires a swim-looking shortcut, abort and take the longer dry route. Review edge discipline on Controls the moment a chase death was actually a swim death.
Loadout and helper tools
DONT SWIM is not a heavy gear MMO — most of the power is game sense. If you experiment with scripts such as Worm ESP or god mode, do it on an alt and expect bans. Fair clears feel better and teach routes you can reuse after every patch.
Codes do not currently change Worm behaviour; there is nothing to redeem that skips the finale.
Practice routine for the finale
- Reach the Worm on purpose in a low-pressure lobby.
- Survive for as long as possible focusing only on dry pathing.
- Note whether deaths were grabs or swims — track them separately.
- On the next attempt, ban the death type you just logged (for example, “no pool-side kites tonight”).
- Rank which arenas feel worst and cross-check the Tier List for community agreement.
Mindset
The Worm is scary because the game trained you to fear water for ten minutes first. Panic is the real mechanic. Slow the camera, pick a dry vector, and commit. When you escape, send teammates back to the Guides hub so the next lobby learns faster than you did.
Related pages
- Level Walkthrough — reach the finale cleanly
- Controls — keep swim state off while fleeing
- Players — callouts and spacing
- Updates — finale changes after patches
- Official Links — join the live game
Survive the spawn cue, respect the water, and treat every Worm run as a pathing puzzle with teeth.
Frequently Asked Questions
Quick answers for Poolrooms runs and Worm escapes.
When does the Worm spawn in DONT SWIM?
After you clear every level. It does not hunt during normal stage progression.
Does getting caught by the Worm end the run?
Yes. A Worm catch is a fail condition equal in importance to swimming.
Can I still fail by swimming while escaping the Worm?
Yes. Swim state fails you even during the finale, so keep kite paths on dry tiles.
Any tips for large servers during the Worm phase?
Spread out, appoint one direction caller, and avoid shoving on narrow pads so the whole lobby does not cascade into water.